[ad_1]
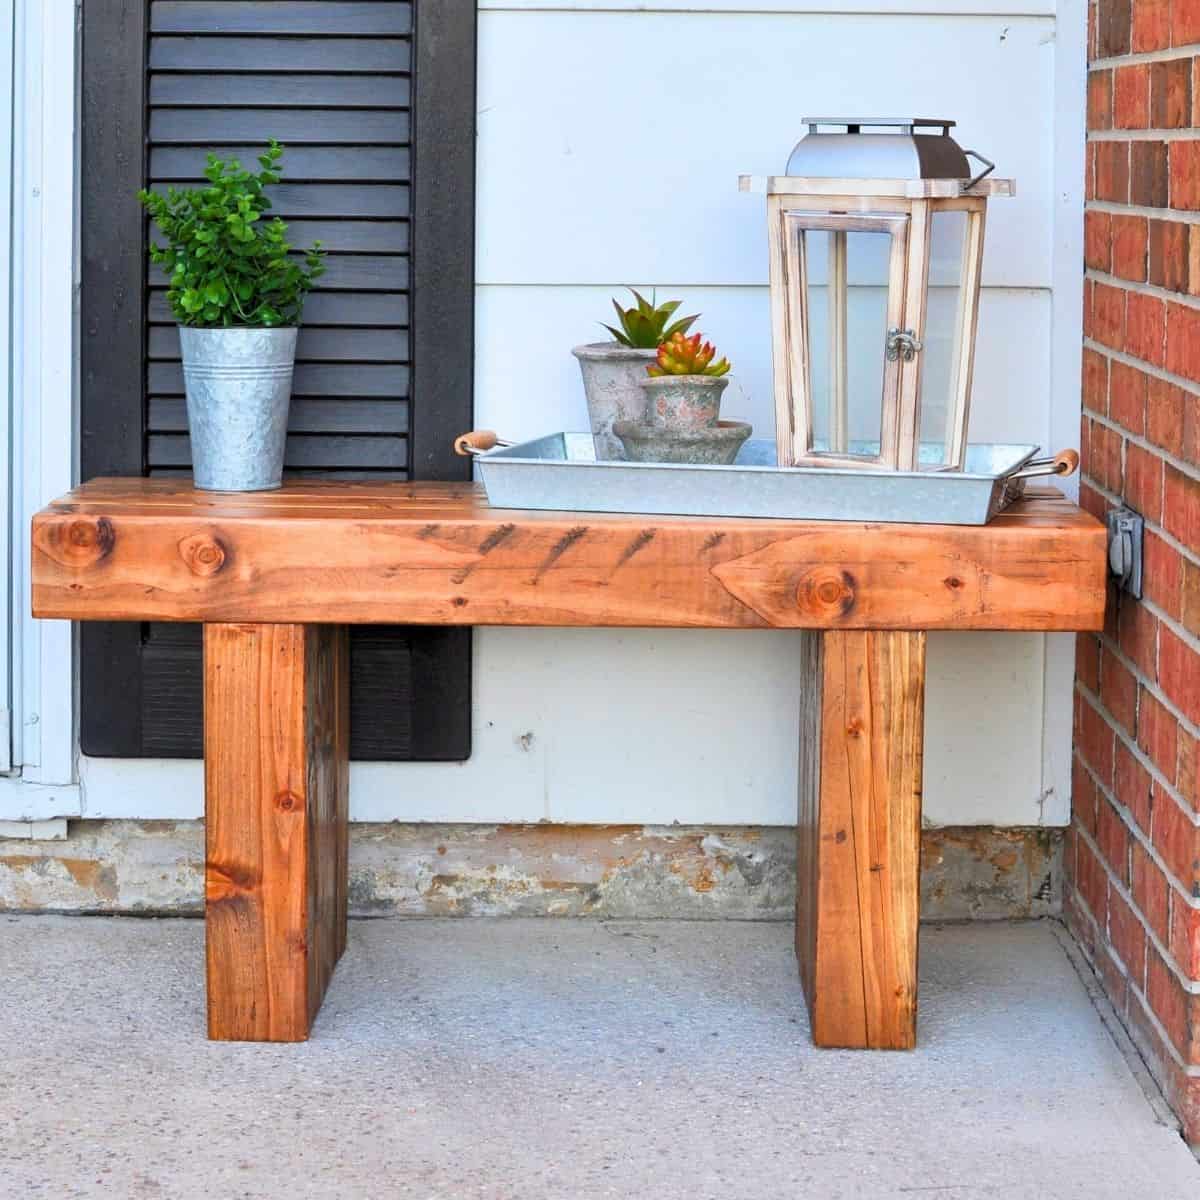
Get the look of a custom bench without the price tag. These DIY outdoor bench plans walk you through the process, even if you’re new to carpentry.
The snow has finally melted, and I’m way too excited to be outside again.
With the warmer weather calling, I’ve got a super simple DIY outdoor bench project to share.
It’s easy to build, doesn’t require a ton of tools, and let me tell you—this thing is sturdy.
Like, “don’t even try to move it without help,” kind of sturdy.
Jump to:
Materials

Cuts
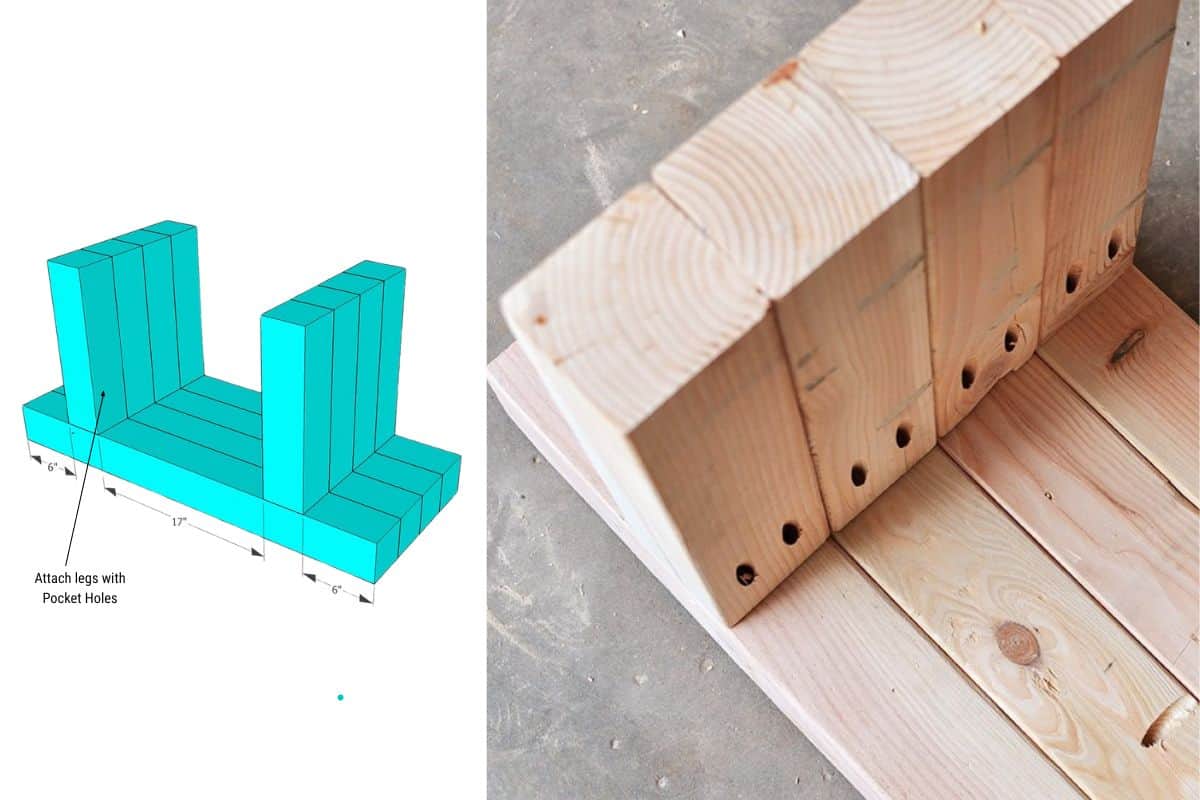
- 8 – 4 in. x 4 in. x 14 ½ in.
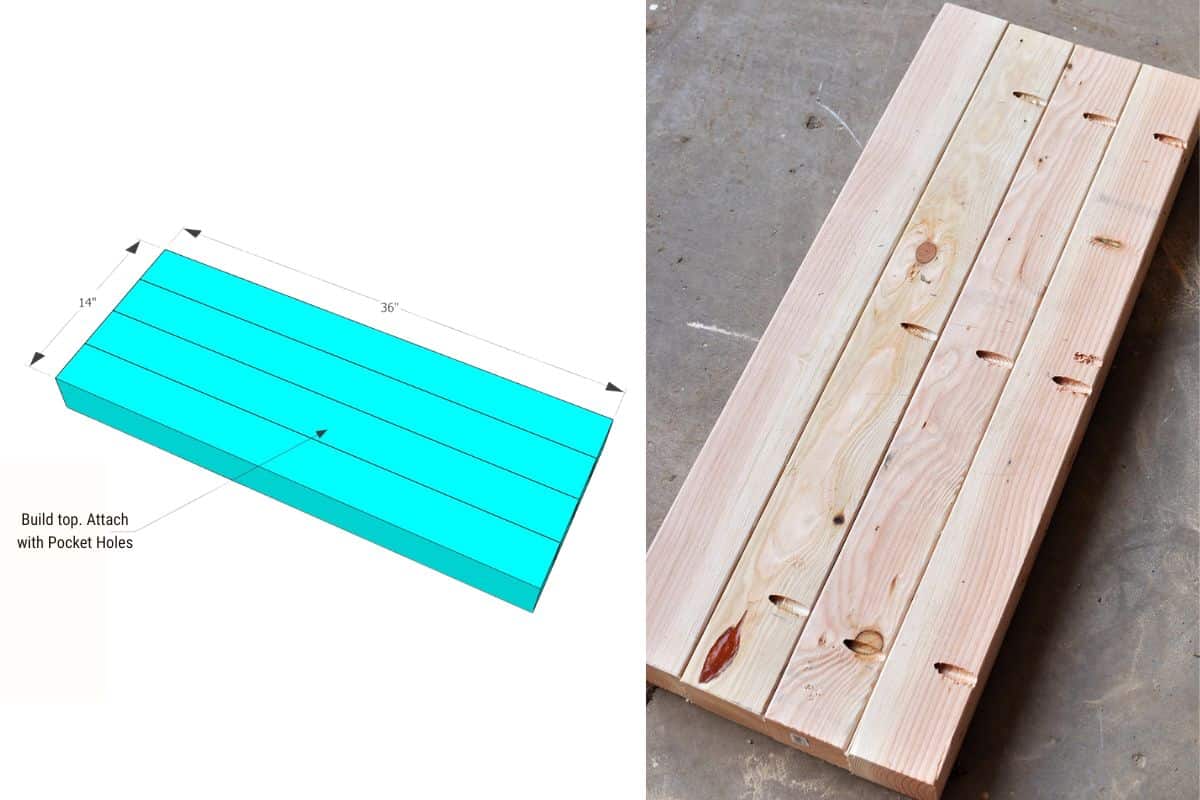
- 4 – 4 in. x 4 in. x 36 in.
Instructions
Step 1: On all 8 of the 4 in. x 4 in. x 14 ½ in. pieces, make two pocket holes at the top using the Kreg Jig.
With 6 of the 4×4’s, make 3 pocket holes spaced evenly along the horizontal sides.
Join (4) 4×4’s to make one leg with 2 ½” Kreg screws and exterior wood glue.
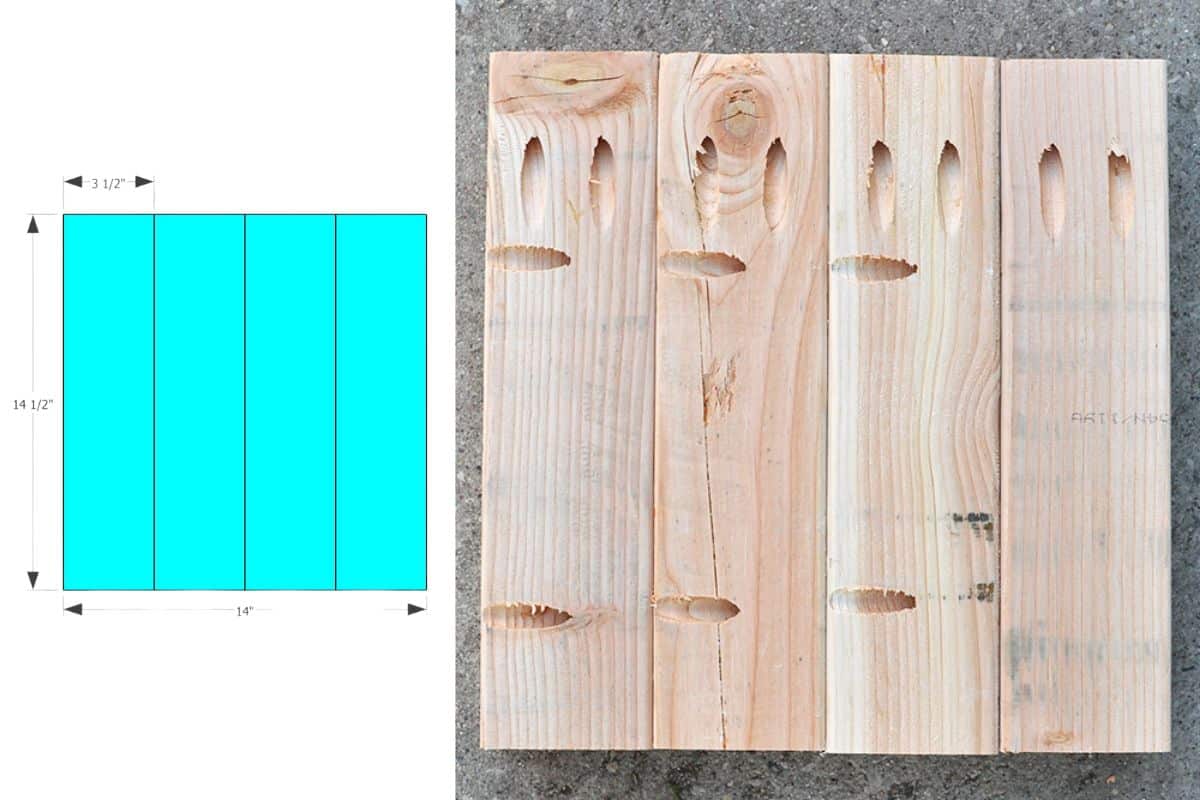
Repeat for the second leg.
Step 2: On 3 of the 4 in. x 4 in. x 36 in. pieces, make 3 pocket holes along the horizontal edge, spaced evenly.
Join all 4 pieces together with pocket hole screws and exterior wood glue.
Step 3: Measure 6” from the edge and line up your legs.
Attach to the bottom side of your bench top using pocket hole screws and wood glue.
Step 4: Fill all pocket holes with either wood plugs or wood filler (let dry) and sand the entire bench, working your way up to 220 grit sandpaper.
Round the edges on the final sanding, if desired, to avoid sharp edges.

Step 5: Apply stain and exterior sealant according to the product’s instructions.
Final Thoughts
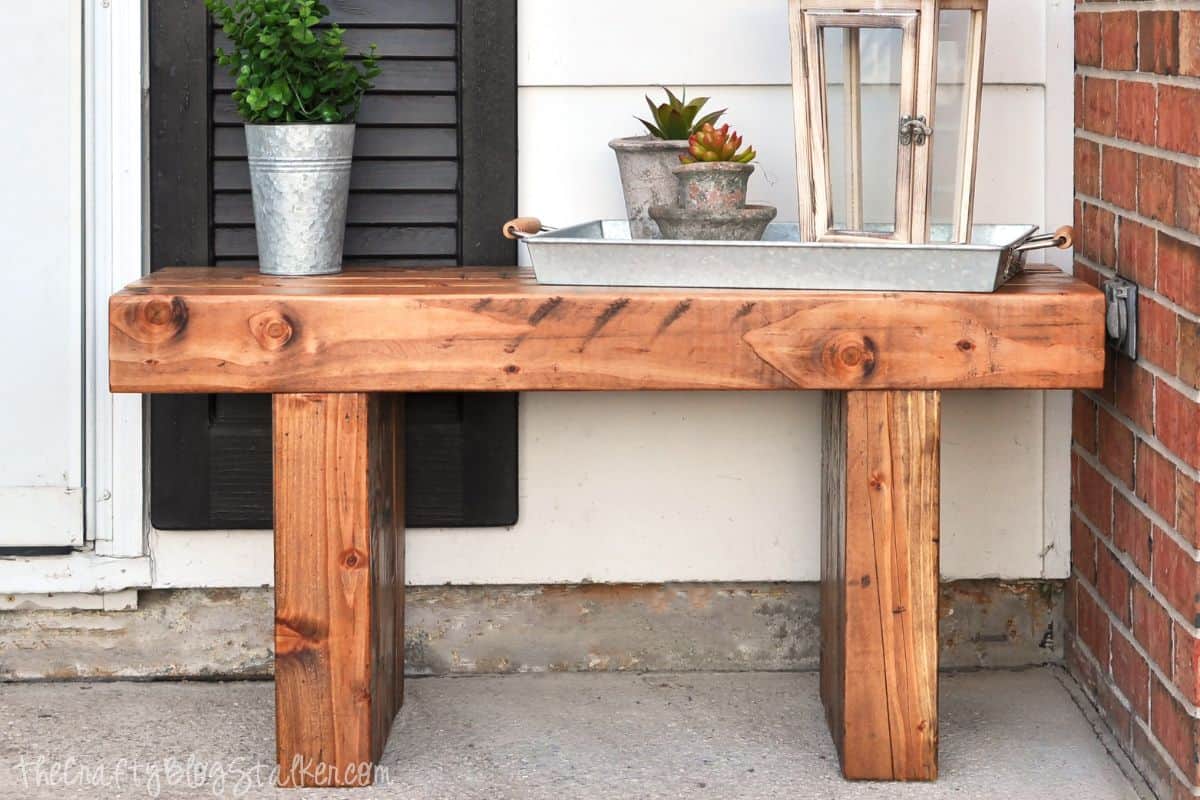
This new bench sits right outside my front door, which seems to be the mailman’s new favorite place to put all my boxes!
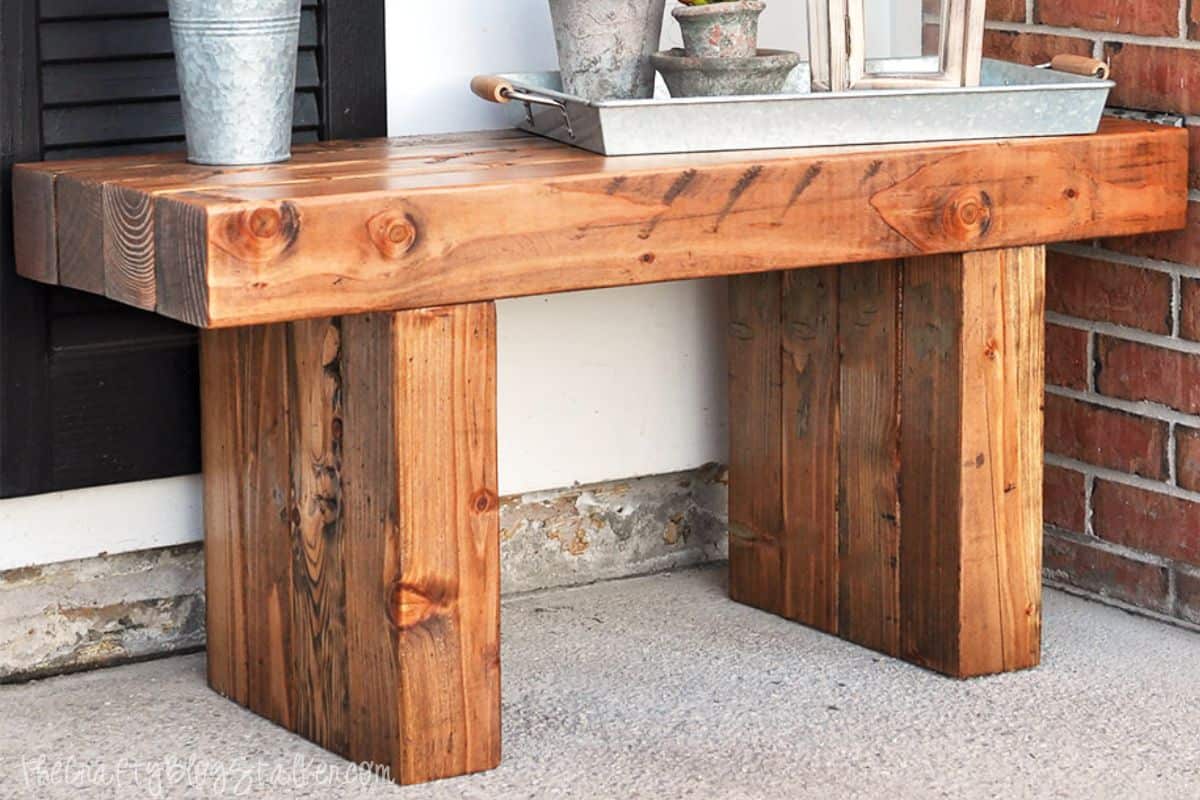
I really do love this bench. It provides a nice place to sit (or put packages), and it just looks so lovely on my front porch!
More Free Build Plans
Don’t put those power tools away yet. There are more fun things to make!

Hi, I’m Katie!
I’m so glad you’re here. Want to make something fabulous? I’m here to help!
[ad_2]
Source link