[ad_1]
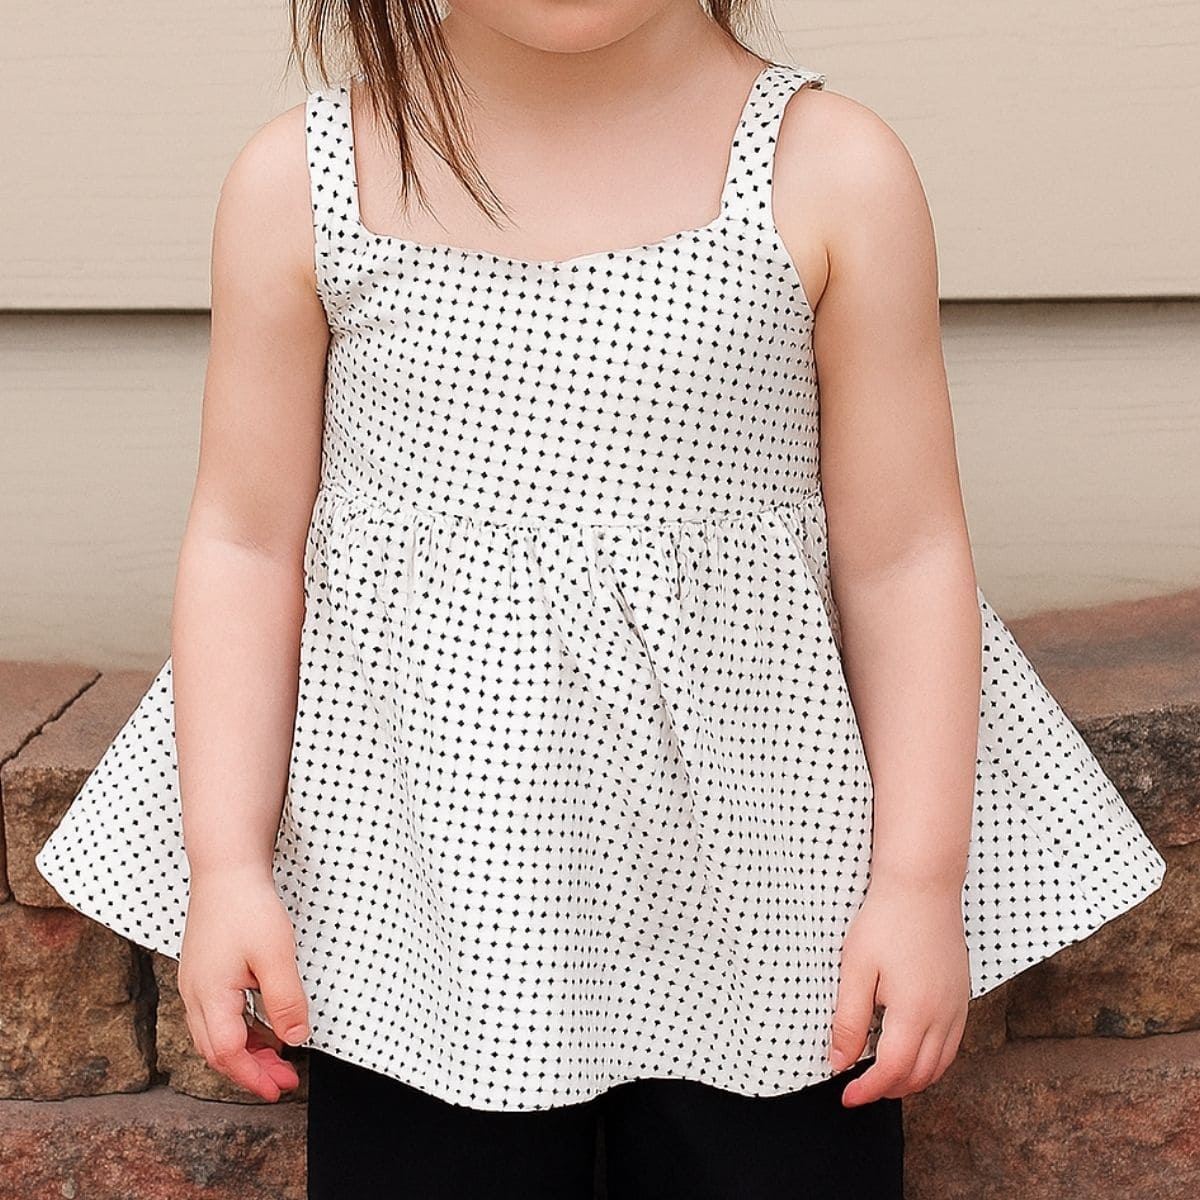
Next, attach the front panel.
I based the measurements of the shirt I used for the bodice on the original measurements, but I added a few inches to allow for a slightly ruffled effect.
So once I ruffled the fabric, I serged it onto the bodice, right sides together. Make sure and leave a seam allowance on the sides to attach the back panel to.
Then I pressed the seam towards the top and top-stitched.

For the back panel, you want it to be the same length as the front panel, but you have to take into consideration the extra allowance for the casing for the elastic.
However, before you create the casing for your elastic, you will need to cut out a small section from the top of the back panel, creating a cut-out look under your bow.
To do this, I folded my back panel piece in half, wrong sides together. Starting at the fold, I measured about 1 ½” down and cut out curving up towards the corners of the raw edges.
Don’t make the dip too big here, because once you add the elastic, it will look more drastic. I made a diagram to help explain where to cut.

On the curve, serge your top edge and then fold over to create your casing for the elastic.
Press and stitch in place.
Using a safety pin, feed your elastic through. (I cut my elastic a little shorter than the width of the bodice. Then stitch your elastic in place with a basting stitch.

Layer the front and back panel pieces with right sides together and sew or serge the side seams.

Once that is done, finish your bottom edge and hem.
You are done! Now you have an adorable little shirt.
[ad_2]
Source link