
This post may contain affiliate links. For more information, please see our disclosure policy.
Here’s your go-to guide for two easy, tasty ways to make Fry Bread at home! It’s perfectly crispy outside and soft inside. Get the recipes and start frying!

Scones, fry bread, Navajo tacos, or even sopaipillas—whatever name you grew up with, one thing’s for sure: they’re pure comfort on a plate!
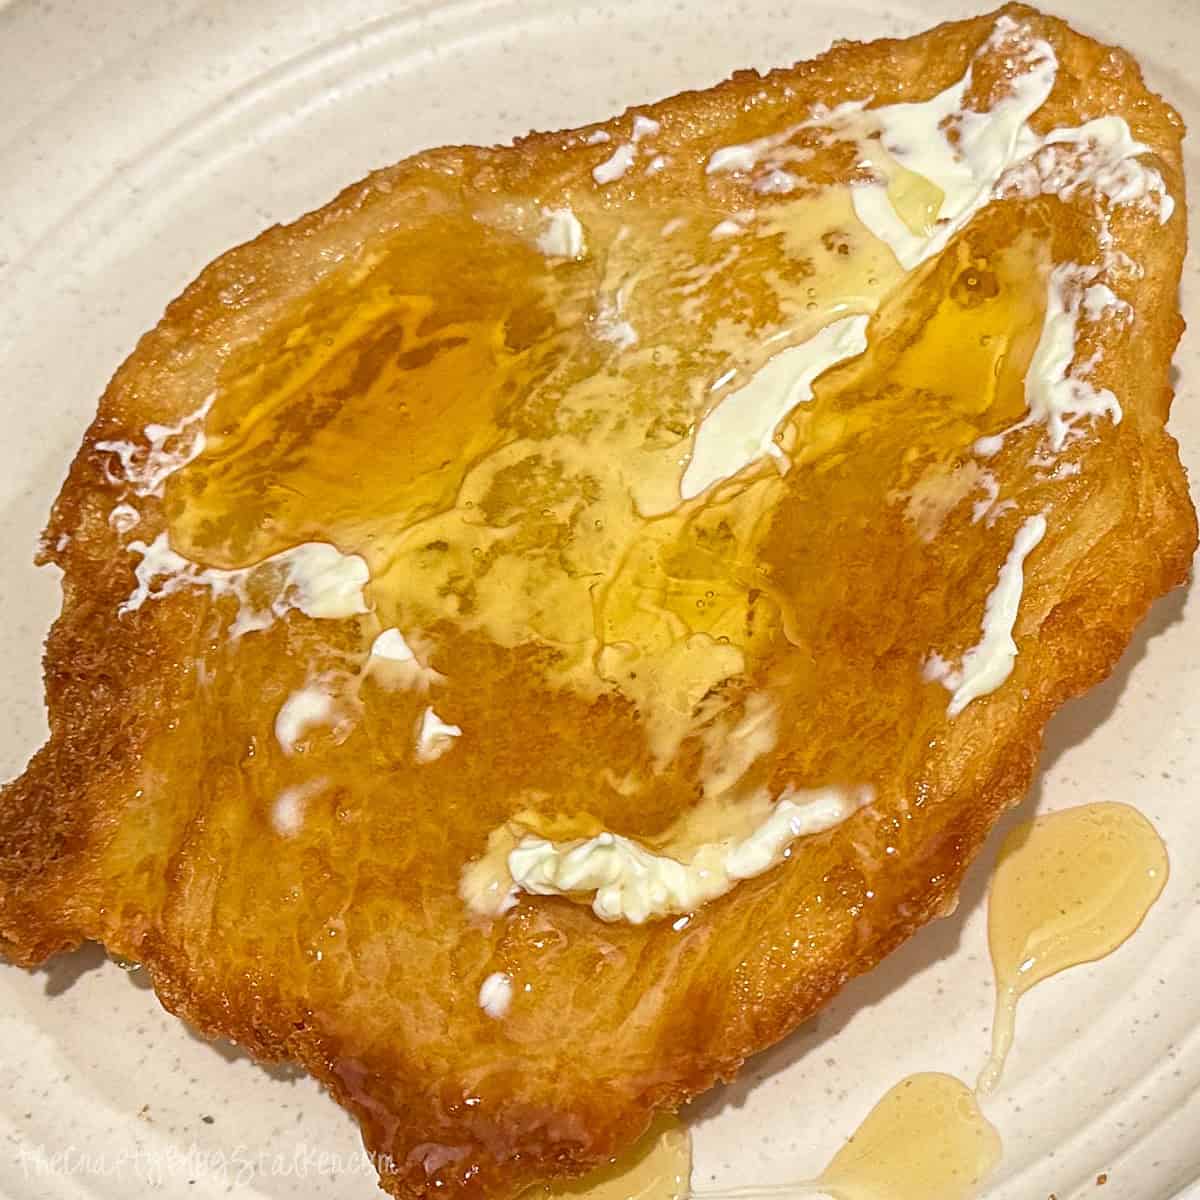
Growing up, I called them “scones,” they were a delicious staple, hot and fresh, smothered in melted butter and honey.
Ready to make your own? I’ll share two ways to make them. One is quick, and the other is from scratch!
Jump to:
Bread Maker Ingredients
- 1 cup Water
- 2 tablespoons butter
- 1 ½ teaspoons salt
- 3 cups bread flour
- 2 tablespoons dry milk
- 1 tablespoon sugar
- 2 teaspoons active dry yeast
- Oil for frying
Bread Maker Instructions
I love homemade bread but don’t enjoy making it. All of the waiting for it to rise, then kneading and waiting…
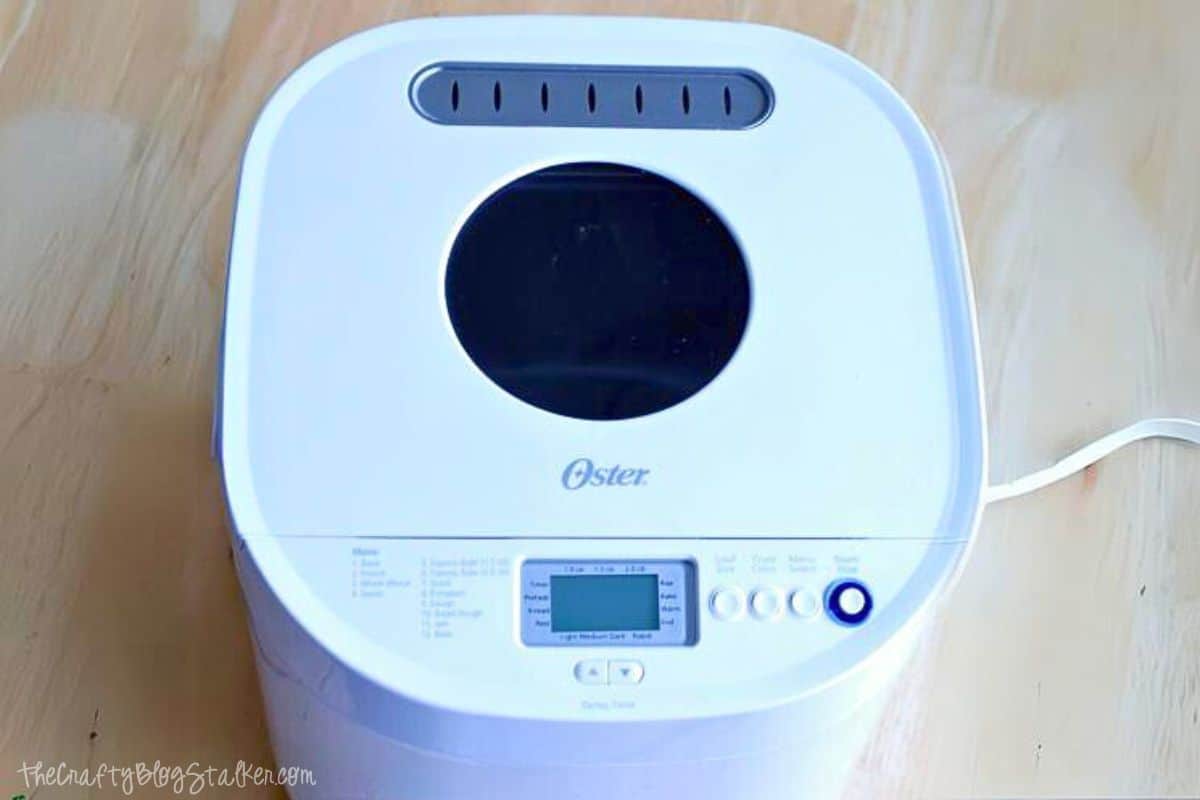
That is why I love my Oster Breadmaker. It does all of the kneading for me. I love it!
For the fry bread dough, I used a traditional white bread recipe.
- Measure and add liquid ingredients to the bread pan.
- Measure and add dry ingredients (except yeast) to the bread pan.
- Use your finger to form a well (hole) in the flour where you will pour the yeast. Yeast must NEVER come into contact with a liquid when adding ingredients. Measure the yeast and carefully pour it into the well.
- Snap the baking pan into the breadmaker and close the lid.
- Press the “Start/Stop” button.

Stop the machine when the dough is finished, but before it starts baking.
Mine took about 90 minutes to make this glorious bucket of bread dough.

Frozen Dough Ingredients
- Frozen Dinner Rolls
- Oil for Frying

Fry the Bread
The bread frying method is the same for bread maker dough and frozen dough.
Place a large skillet with about ½ – ⅓ inch of oil on the stove. Heat to medium-high.

Test the oil’s heat by dropping a small sprinkle of water into the pan. If it pops, the oil is hot enough.
Carefully lay the piece of flattened dough into the hot oil. It should immediately start sizzling.

You can cook several at a time, depending on the size of your skillet.
Cook for 1-2 minutes on each side or until golden brown.

When you pull them out of the oil, lay them on paper towels to collect the excess extra oil.

Let them cool for a minute before eating them, but they are better when you can eat them nice and warm.
Eat and Enjoy
My favorite way to eat scones is with butter and honey. It’s delish!

Dough Difference
Once fried, both types of dough are delicious and have a similar taste. The most significant difference is the thickness and texture.
The bread maker dough is thicker, while the frozen dough is slightly thinner, and the edges get crispier.
Fry Bread with a Bread Maker
Craving fry bread but not the effort? Let your bread maker do the work! Get golden, fluffy fry bread that’s perfect with honey, butter, or taco toppings.
Ingredients
- 1 cup Water
- 2 tablespoons Butter
- 1 ½ teaspoons Salt
- 3 cups Bread Flour
- 2 tablespoons Dry Milk
- 1 tablespoon Sugar
- 2 teaspoons Active Dry Yeast
- Oil for frying
Instructions
Bread Maker
-
Measure and add liquid ingredients to the bread pan.
-
Measure and add dry ingredients (except yeast) to the bread pan.
-
Use your finger to form a well (hole) in the flour where you will pour the yeast. Yeast must NEVER come into contact with a liquid when adding ingredients. Measure the yeast and carefully pour it into the well.
-
Snap the baking pan into the breadmaker and close the lid.
-
Press the “Start/Stop” button.
-
Stop the machine when the dough is finished, but before it starts baking.
-
Mine took about 90 minutes to make this glorious bucket of bread dough.
Dough Prep
-
Take a small handful of bread dough and pinch it off.
-
Roll it out on a floured surface to about ¼-inch thickness.
-
Cut into manageable pieces. Of course, the bigger the piece, the bigger the scone!
Fry
-
Place a large skillet with about ½ – ⅓ inch of oil on the stove. Heat to medium-high.
-
Carefully lay the piece of flattened dough into the oil. It should immediately start sizzling. You can cook several at a time, depending on the size of your skillet.
-
Cook for 1-2 minutes on each side or until golden brown.
-
When you pull them out of the oil, lay them on paper towels to collect the excess extra oil.
Fry Bread with Frozen Dough
Fry bread in a flash—no mixing required! Just grab some frozen dough, fry it up, and enjoy a deliciously golden treat with all your favorite toppings.
Ingredients
- Frozen Dinner Rolls
- Oil for Frying
Instructions
Prep The Dough
-
Since all frozen rolls can be slightly different, I recommend following the package instructions for thawing them.
-
Spray a baking sheet with cooking spray, place the frozen rolls on top, and then cover with plastic wrap.
-
Let rise for 3 to 5 hours or until they have doubled in size.
-
Separate a dough piece and flatten and stretch between the palms of your hand
Fry
-
Place a large skillet with about ½ – ⅓ inch of oil on the stove. Heat to medium-high.
-
Test the heat of the oil by dropping a small sprinkle of water into the pan. If it pops, the oil is hot enough.
-
Carefully lay the piece of flattened dough into the oil. It should immediately start sizzling.
-
You can cook several at a time, depending on the size of your skillet.
-
Cook for 1-2 minutes on each side or until golden brown.
-
When you pull them out of the oil, lay them on paper towels to collect the excess extra oil.
Our Baking Essential List
- We use Glass Baking Dishes for baking casseroles. I especially like the dishes with lids because leftovers can be transferred straight to the fridge.
- Silicone Kitchenware is my favorite because they don’t scratch my cookware and is easy to clean!
- A Glass Cutting Board is a must to prepare all of those ingredients. We even keep ours on our counter at all times.
- This Knife Set will also become your favorite! The knives cut beautifully, and the hollow design prevents food from sticking to the blade.