[ad_1]
Skip the flimsy stuff. These DIY wooden ride-on toys are sturdy, fun to build, and your kids will actually enjoy playing with them. Free plans make it easy.

Jump to:
Grab the Free Printable Plans

Total Time: 1 hour 30 minutes
Materials
Cuts
- Bottom Panel
- (2) Side Panels
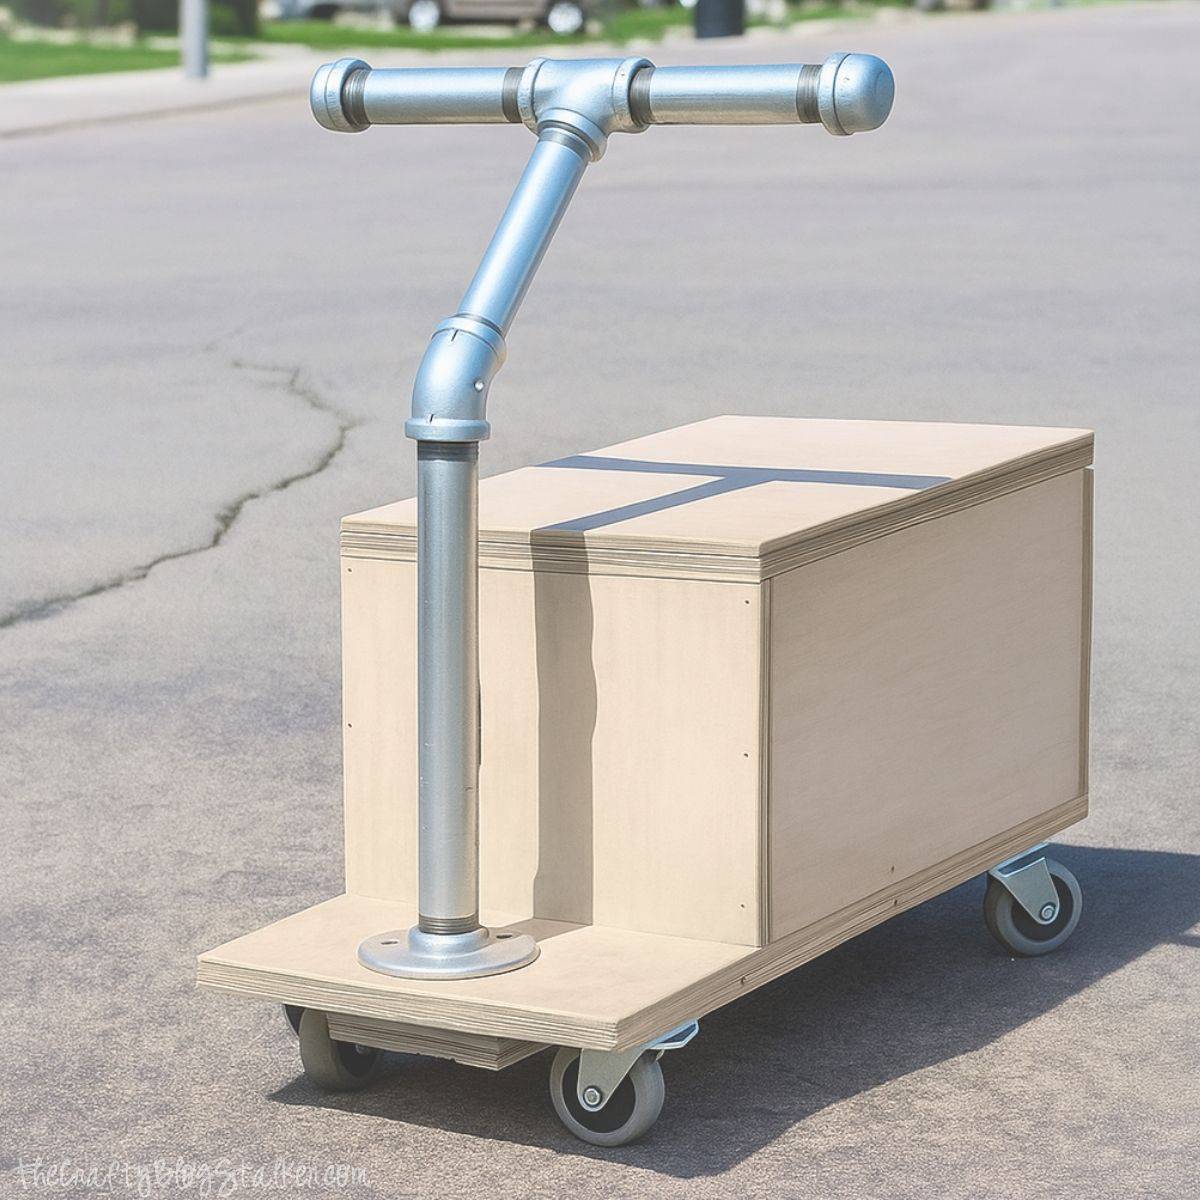
Wood Box
Make the cuts from your sheet of plywood according to the list provided.
Sand the pieces with the orbital sander until smooth.
Attach the (2) side panels to the bottom panel using ¾” Pocket Holes and 1 ¼” pocket hole screws.

Attach Front Panel to the bottom panel using ¾” pocket holes and 1 ¼” pocket hole screws.
With wood glue and finish nails, attach the sides of the front panel to the edges of the side panels.

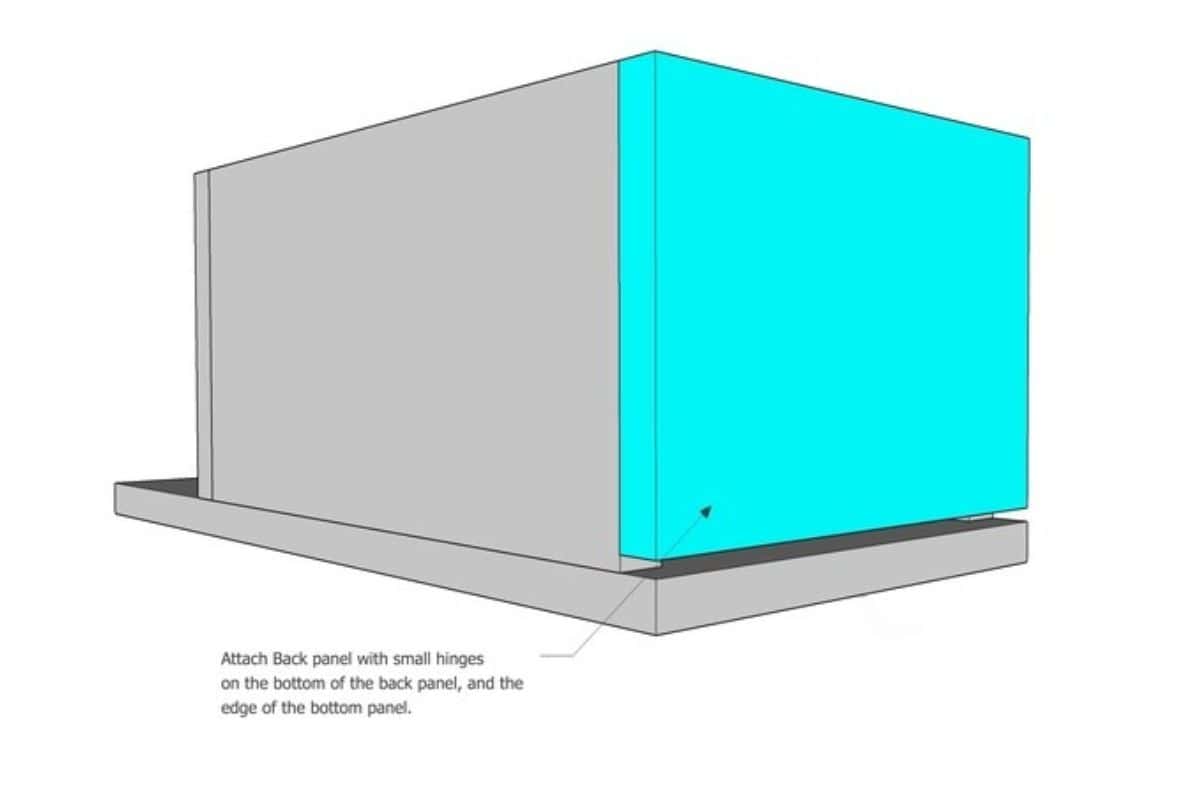
Attach the back panel using 2 small hinges.
Using wood glue and finishing nails, attach the top panel to the edges of the front and side panels.
Ensure that you do not nail into the back panel, so that it can operate as a door.

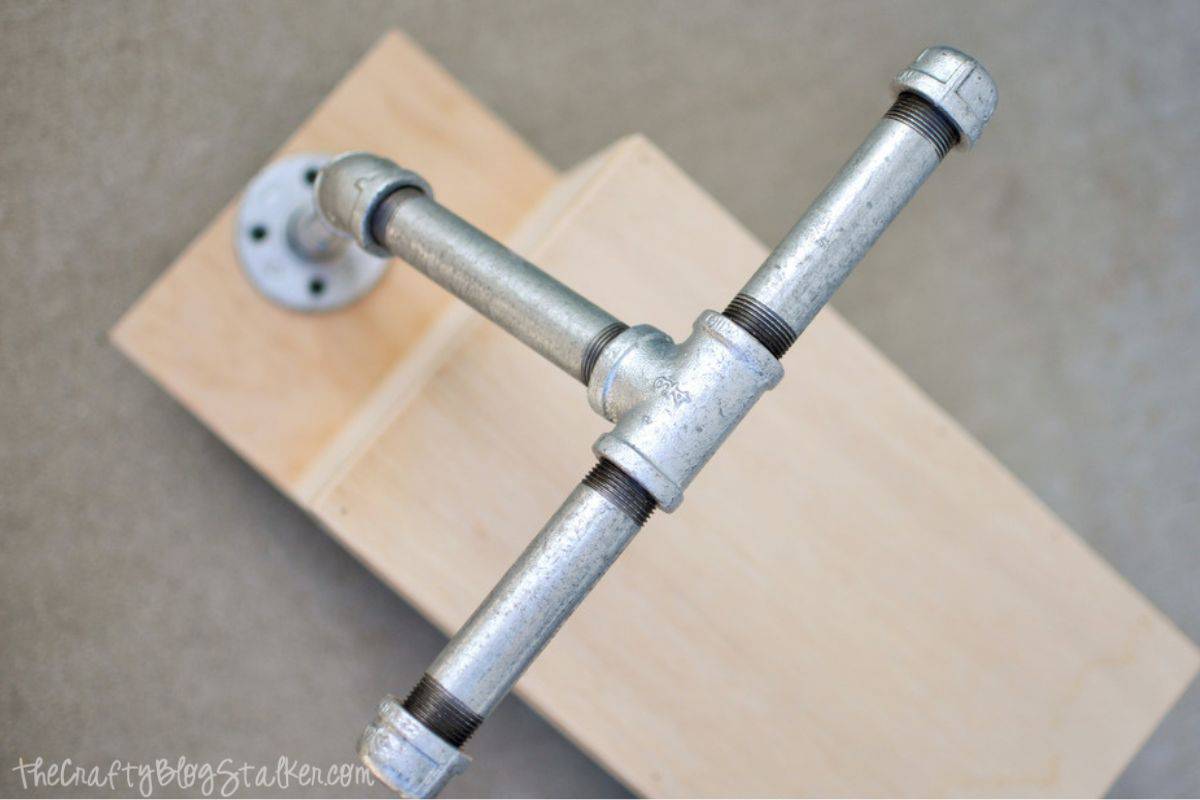
Handlebars
Create your handlebars with the galvanized pipe according to the image.

Attach handlebars to the front of the bottom panel using wood screws.
Add a piece of small scrap wood under the bottom panel (where the handlebars will be attached) so that your screws do not poke through.
Attach with wood glue and a few finishing nails.
Then screw the handlebars onto the bottom panel.
More Free Build Plans
Don’t put those power tools away yet. There are more fun things to make!

Hi, I’m Katie!
I’m so glad you’re here. Want to make something fabulous? I’m here to help!
[ad_2]
Source link