• Home
  • Blog
  • Opinion
  • Lifestyle
  • Health
  • Culture
  • About Us
  • Contact Us
No Result
View All Result
Celebrity Buzz Blast
  • Home
  • Blog
  • Opinion
  • Lifestyle
  • Health
  • Culture
  • About Us
  • Contact Us
No Result
View All Result
Celebrity Buzz Blast
No Result
View All Result

DIY Letter & Number Magnets with Free SVG – The Crafty Blog Stalker

celebritybuzzblast by celebritybuzzblast
June 17, 2025
Reading Time: 4 mins read
0
DIY Letter & Number Magnets with Free SVG – The Crafty Blog Stalker

[ad_1]

RELATED POSTS

Cricut Birthday Gift Box That Feels Extra Special – The Crafty Blog Stalker

Taco Dip

Best Cricut Machines for Beginners Compared – The Crafty Blog Stalker

Add Magnets

You can buy magnets that already have an adhesive side, saving you the need for glue.

I used what I already had, which were non-adhesive sheets.

To cut the magnet sheets, you can either cut strips with scissors or use a ruler and craft knife to cut on a self-healing mat. Cut strips to ½ inch wide.

Person using a craft knife and ruler to cut black magnet sheets on a gridded cutting mat, with colorful painted wooden numbers arranged above.

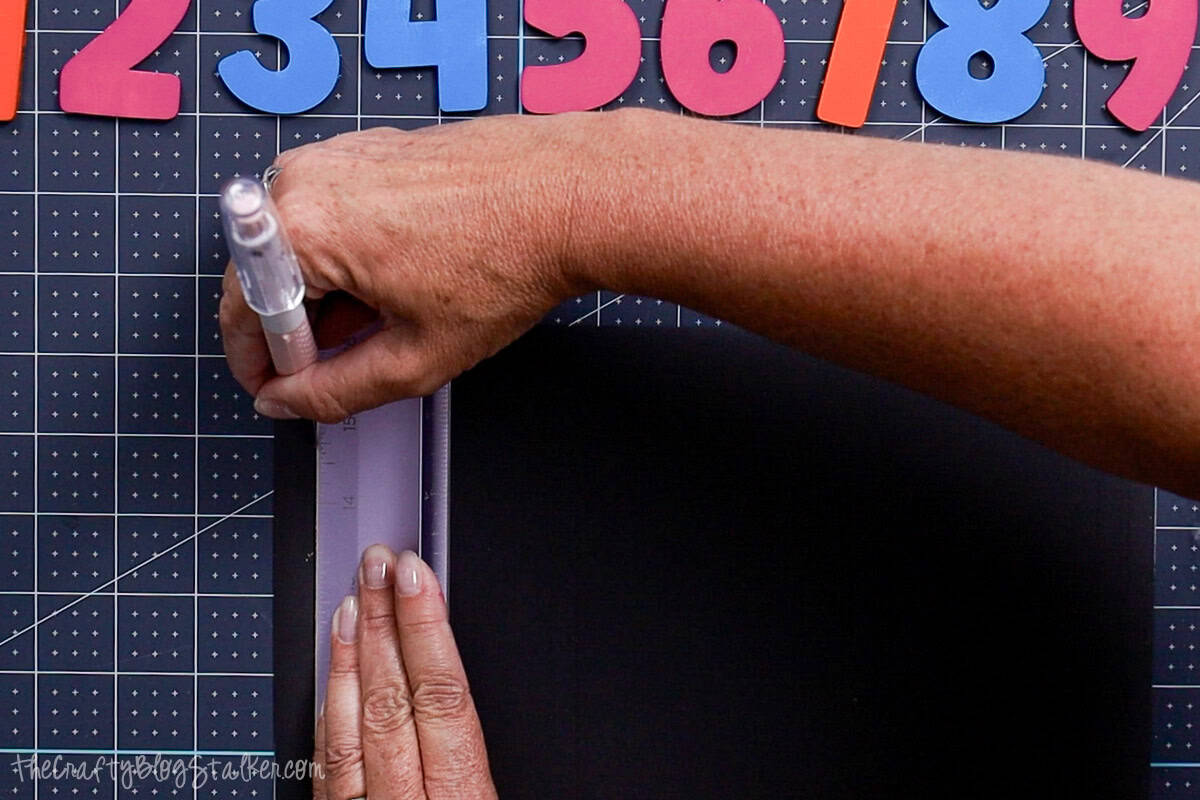
I prefer the ruler method because it keeps the strips straight, but since they are going on the back, it doesn’t really matter.

Turn the numbers over with the painted side down, exposing the back.

Pay attention to which side of the magnetic sheet is magnetic. You can test on any magnetic surface, like a refrigerator or a baking sheet.

I may have glued a few down before I realized this, but the glue had not set, so I was able to fix it. 🤦‍♀️

To measure the magnetic strips for each number, hold them to the back and cut with scissors.

Person measuring and cutting a magnetic strip to fit wooden numbers laid out upside down on a gridded cutting mat for a DIY magnet project.

Apply a bead of glue to the back of the number and place the magnetic strip, magnet side up, into the glue.

Person applying a bead of glue to the back of a wooden number while assembling DIY number magnets on a gridded cutting mat with magnets nearby.

For the curvy letters, cut smaller squares of the magnetic strip, and glue those on.

Backs of wooden number magnets 0–9 with black adhesive magnet strips attached in various shapes, displayed on a white background.


[ad_2]

Source link

celebritybuzzblast

celebritybuzzblast

Next Post
Is Your Workout Enough? Why Daily Movement Matters After 60 | Sixty and Me

Is Your Workout Enough? Why Daily Movement Matters After 60 | Sixty and Me

Cross Country Moving Tips for a Smooth Move – The Crafty Blog Stalker

Cross Country Moving Tips for a Smooth Move - The Crafty Blog Stalker

Leave a Reply Cancel reply

Your email address will not be published. Required fields are marked *

Celebrity Buzz Blast

2024 | All Right Reserved | Celebrity Buzz Blast

Navigate Site

  • Privacy Policy
  • Terms & Conditions
  • Subscription

Contact Us: [email protected]

Social icon element need JNews Essential plugin to be activated.
No Result
View All Result
  • Home
  • Blog
  • Opinion
  • Lifestyle
  • Health
  • Culture
  • About Us
  • Contact Us

2024 | All Right Reserved | Celebrity Buzz Blast