
This post may contain affiliate links. For more information, please see our disclosure policy.
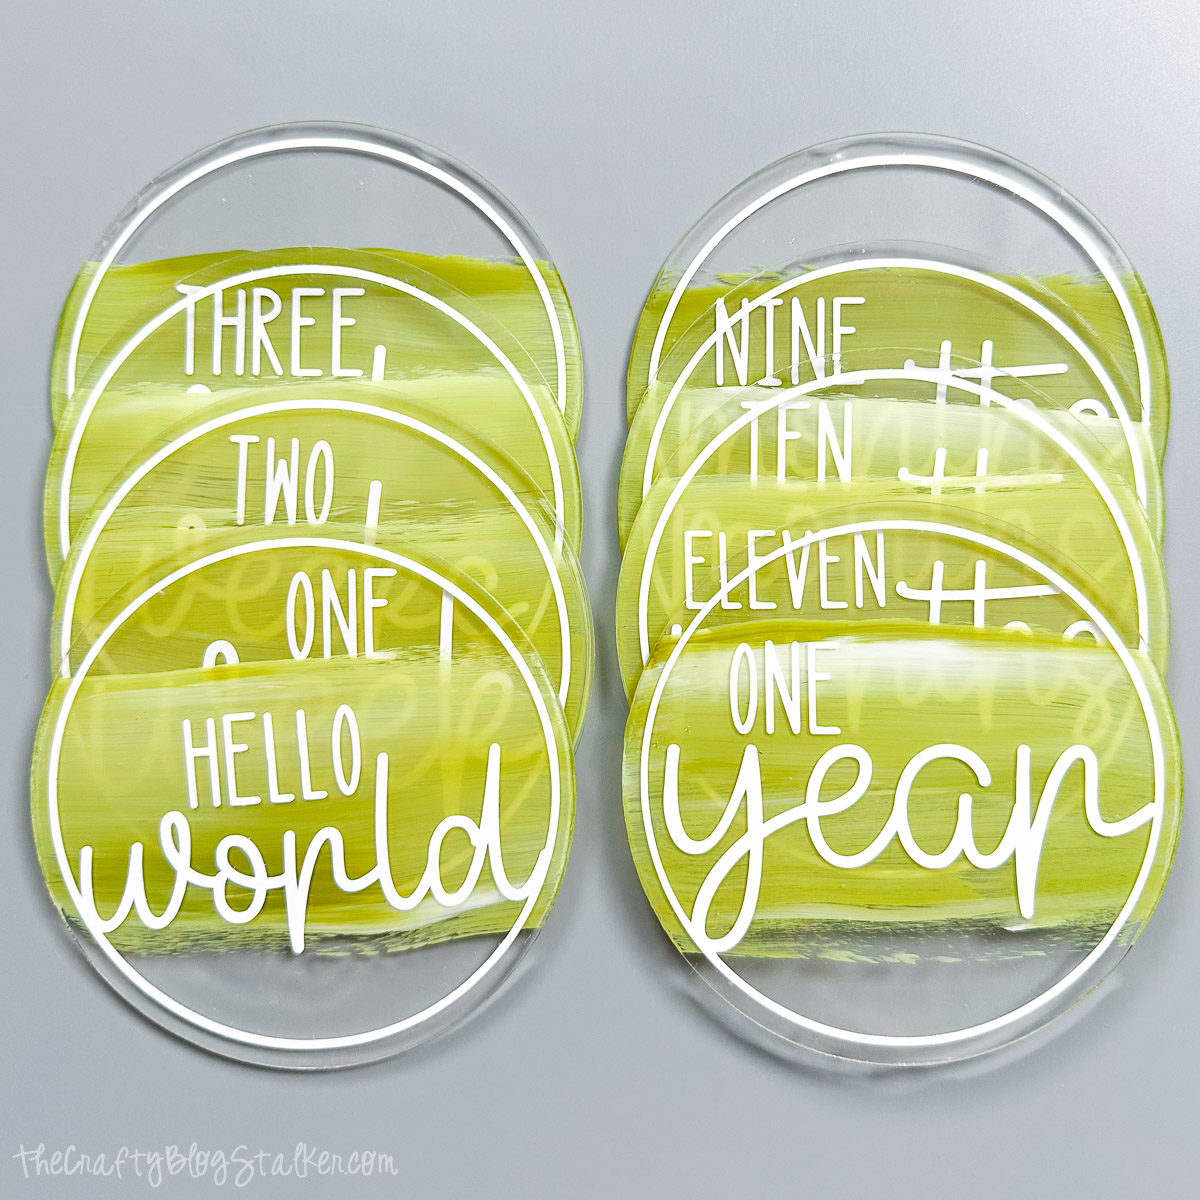
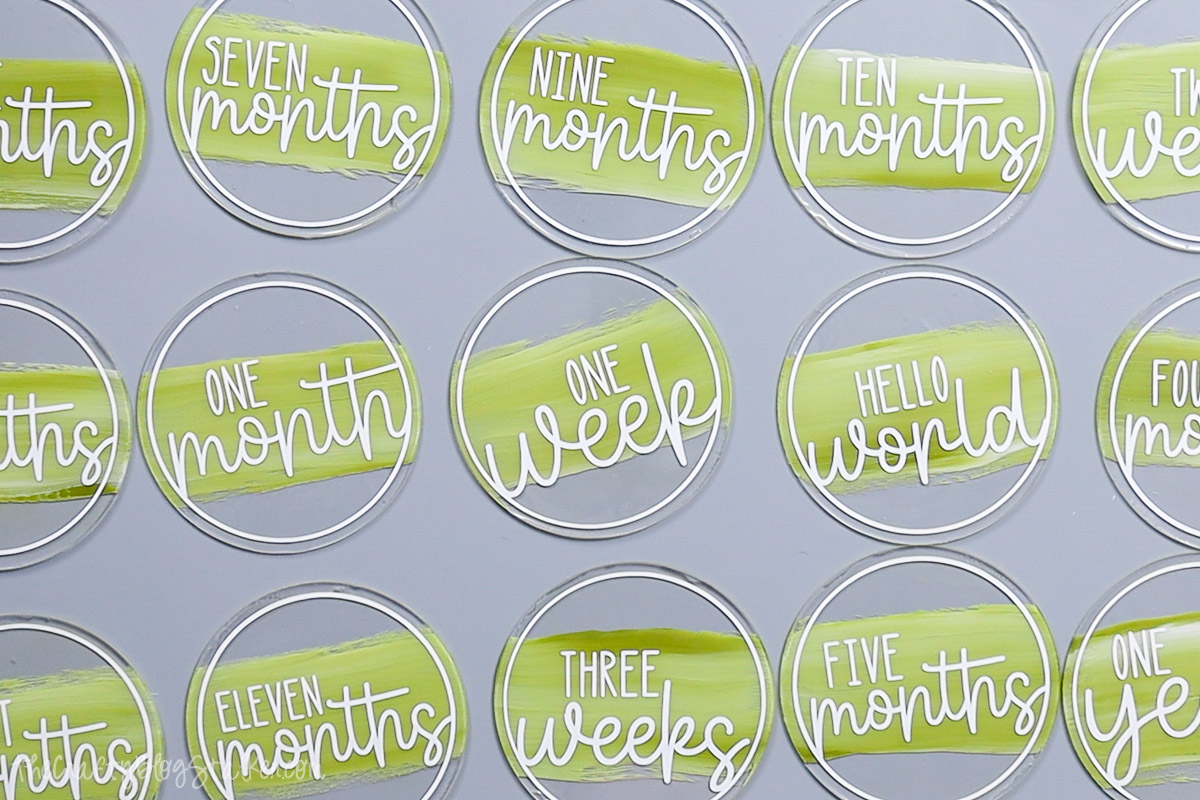
Make your own monthly milestone markers with this free SVG! A sweet and simple way to capture each month of your baby’s first year in adorable style.
Our precious babies don’t stay little for long, so let’s make each month count with something cute and crafty?
These DIY monthly milestone markers are a fun way to track your little one’s growth and snap some sweet photos.
This free SVG lets you make your own set using your favorite colors to match any theme!
Whether you keep them for yourself or for baby shower gifts, these markers are a simple, meaningful project you’ll be glad you made.
Jump to:
Cricut Time: 1 hour
Resin Time: 24 hours
Supply List
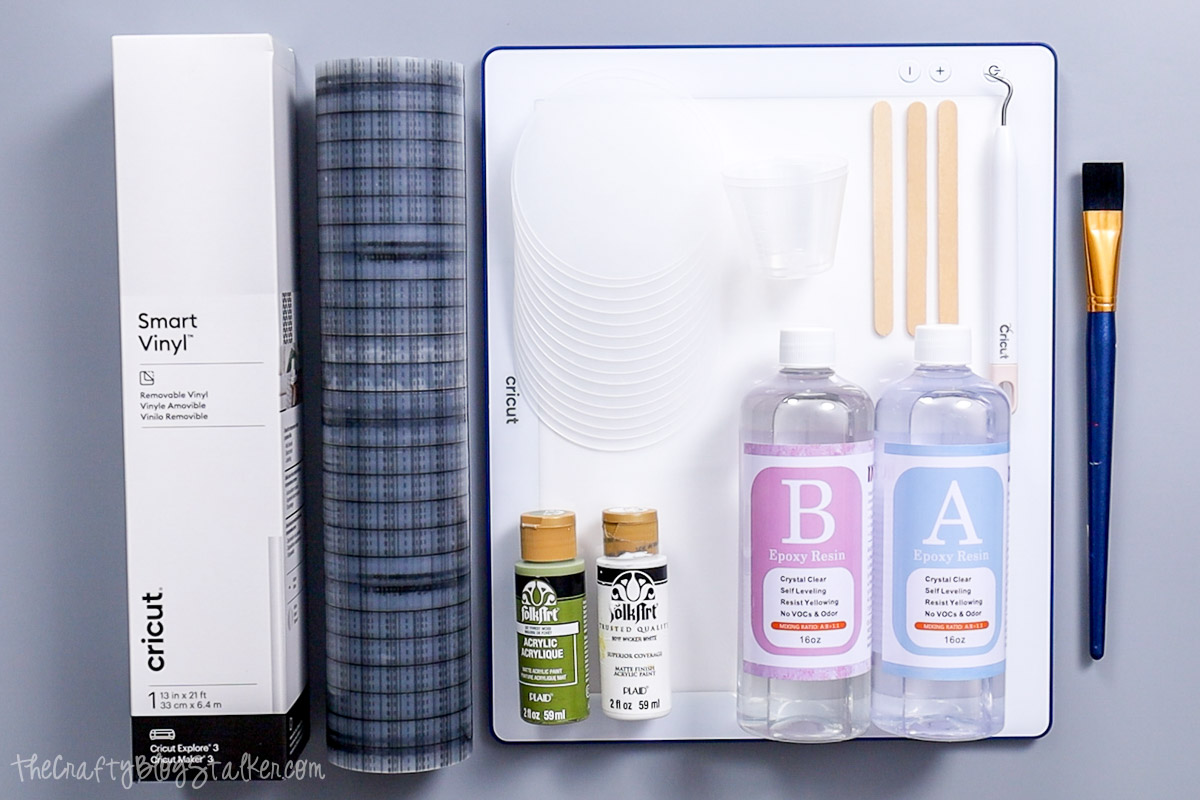
My acrylic circles have a diameter of 4 inches. You can use any size, although you’ll need to resize the file to fit a different size.

Paint Acrylic Blanks
Paint the acrylic circle blanks first so the paint can dry while weeding the vinyl decals.
The blanks come with a protective sheet on both sides.
To start, I only removed the protective layer on one side of the disc.

Add a bit of the paint to a paint pallet. I am using Folk Art, Forest Moss, and Wicker White.
Dip each corner of the paintbrush in a different colored paint.
Apply paint through the center of the disc. Rotating the brush after a couple of strokes so all paint colors are mixed while painting.
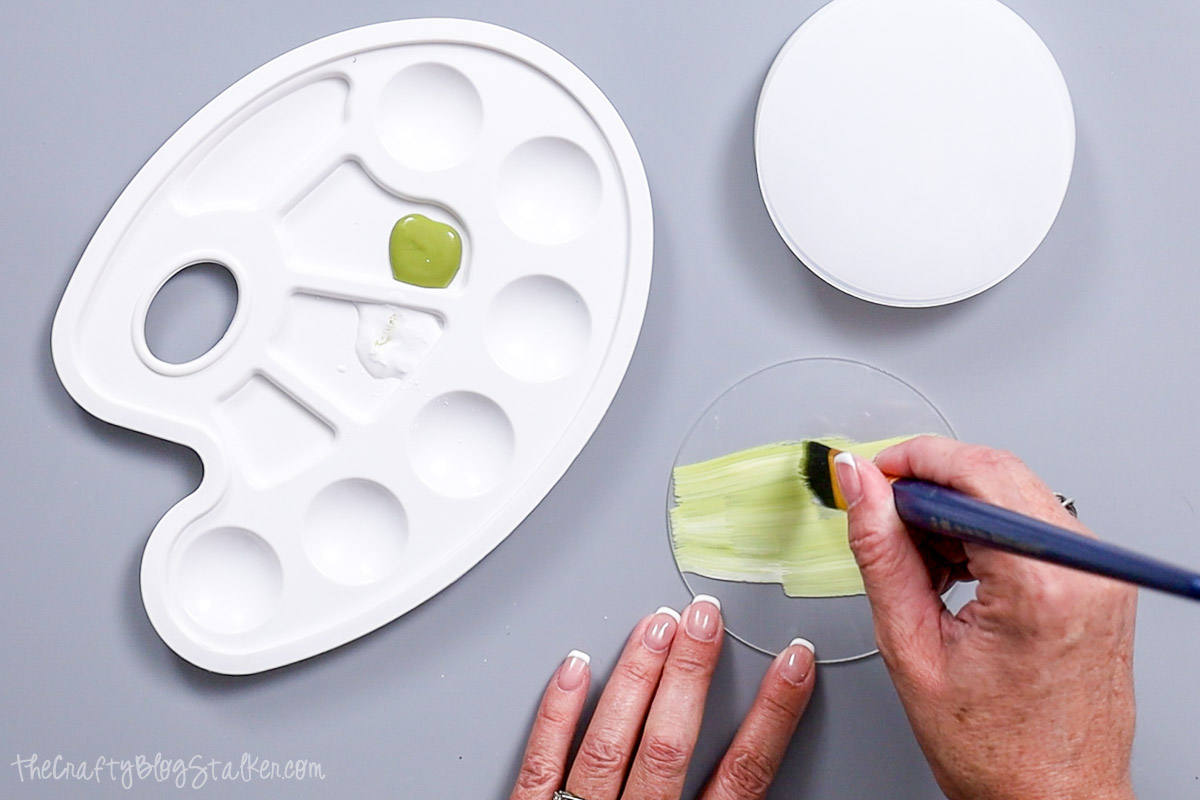
It is okay if brushstrokes show since we are going for an artistic look.
Set the disc aside and let it dry. Repeat with all sixteen of the blanks.

Cricut Design Space
For the following steps, I’ll be using Cricut Design Space.
If you use Silhouette Studio or a different design software, your steps may be different than mine.
To start, upload the SVG into Cricut Design Space and add it to your Canvas.
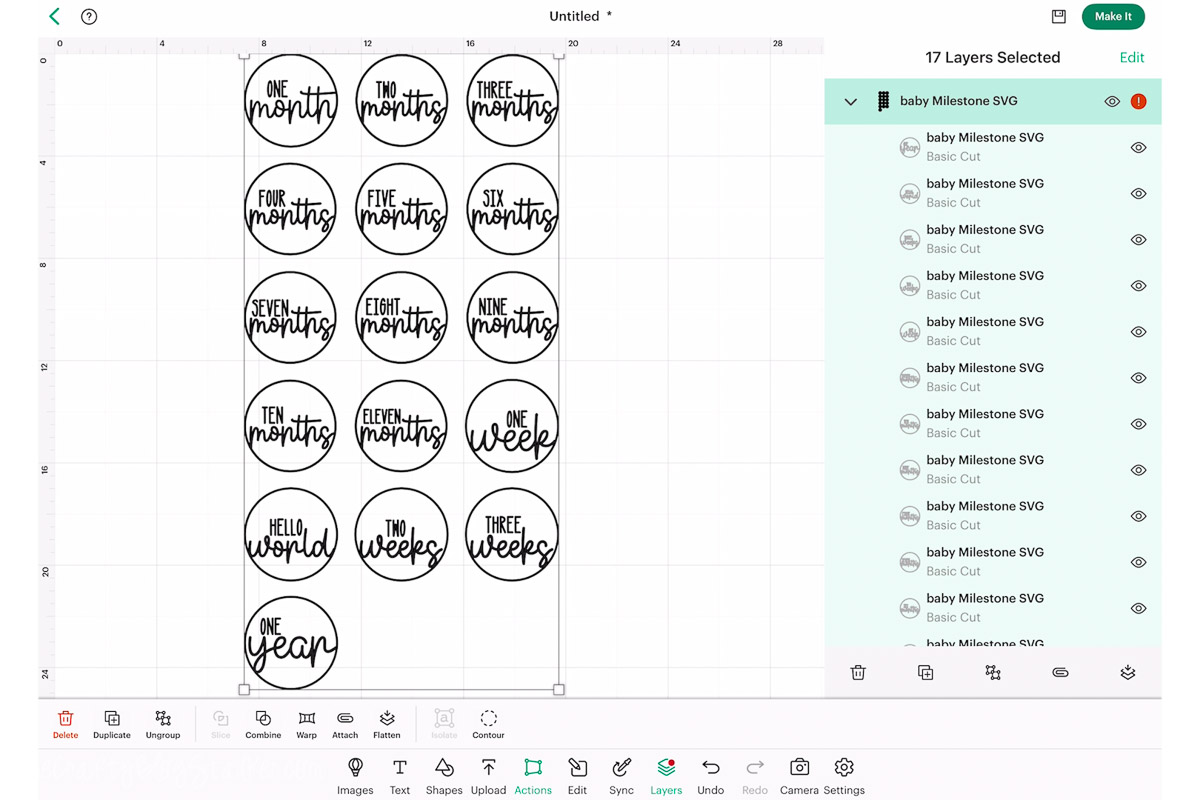
As uploaded, the design is too large to cut, and a red error icon is at the top of the layers panel to let you know.
To remove the error, highlight and ungroup.

Each circle is sized to fit the 4-inch circle clear acrylic blanks. If you are using a different size circle, resize them as needed.
Add a circle from the Shapes section and size to the same size as your circle blanks. This shape will be cut out of paper, not vinyl, so make sure it is a different color than the markers.

Apply Vinyl
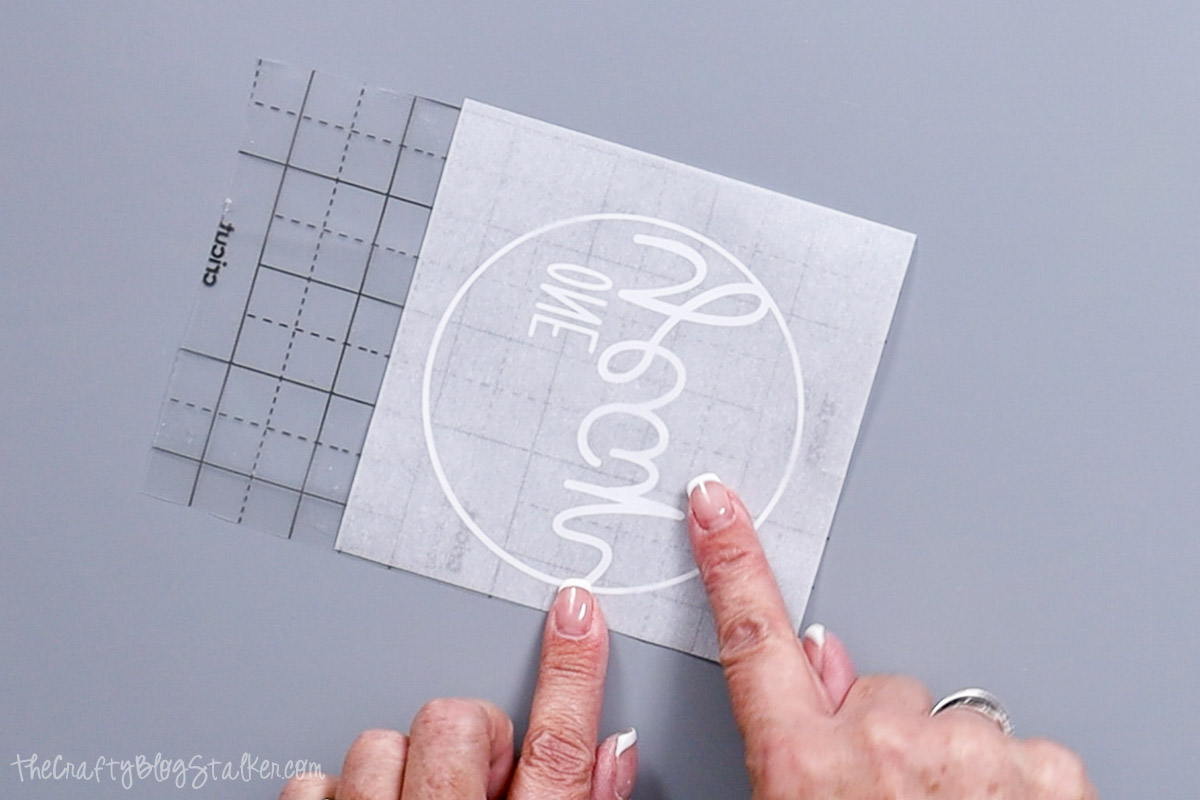
The BrightPad really comes in handy for this stop. It isn’t a must, but it makes aligning the decal on the disc much easier.
Cut a piece of parchment paper and transfer tape slightly larger than the decal.
Apply the transfer tape to the top of the vinyl decal, press, and then slowly peel back the liner.
Cover the decal with the parchment paper, ensuring a part of the transfer tape is still exposed.
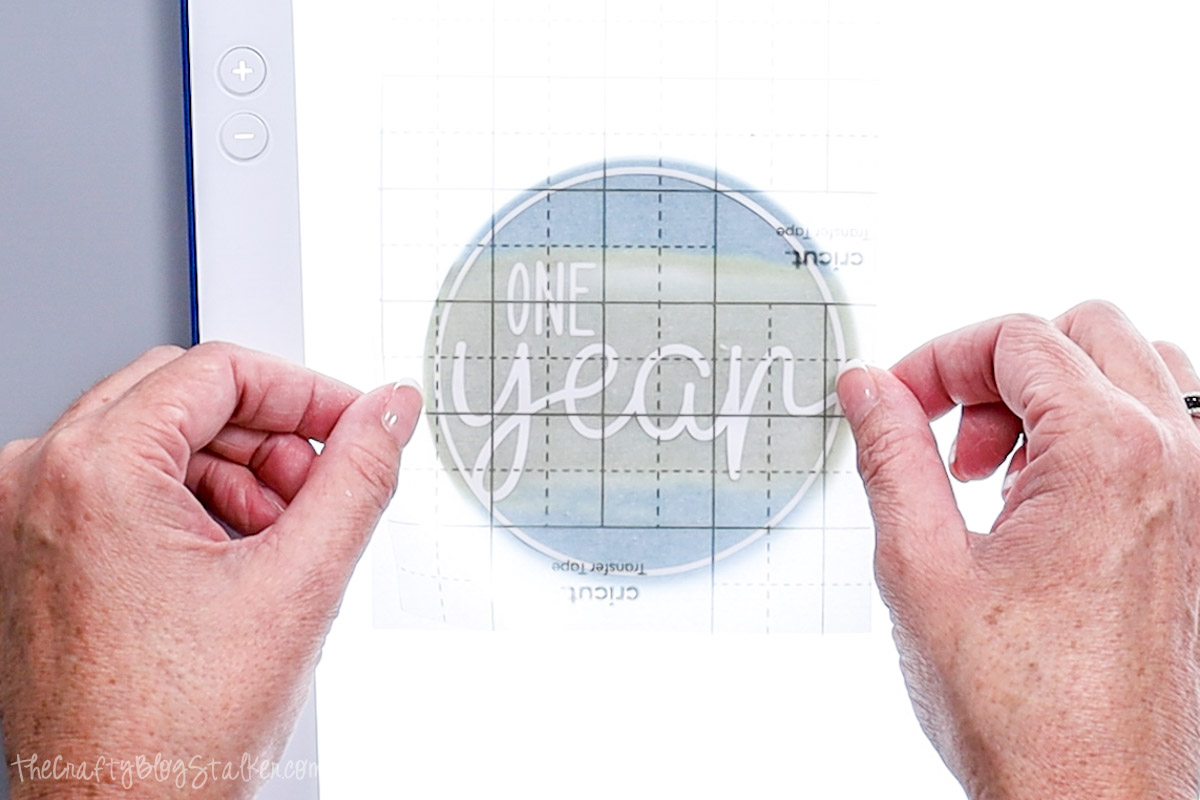
Remove the protective sheet from the other side of the acrylic blank.
Place the cut circle shape behind the disc and lay it on a lit BrightPad.

Center align the design onto the circle disc. That cardstock circle really helps you find the exact placement.
Press the top of the transfer tape to the BrightPad and lift to remove the parchment paper carefully. Don’t move the acrylic blank.
Roll the transfer tape down onto the disc.
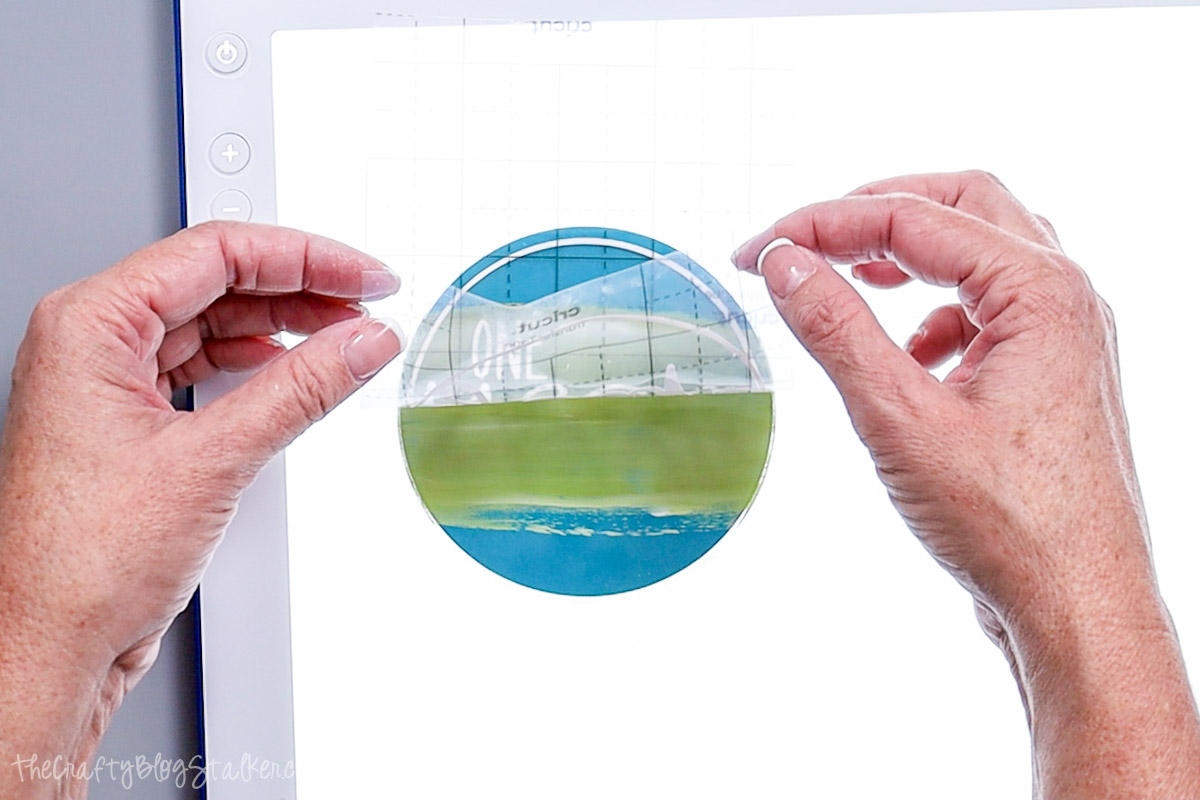
Press the vinyl into the disc using a finger or scraper tool, then peel the tape back.
Now, you can lift up the disc and see the medallion. It looks so cool!
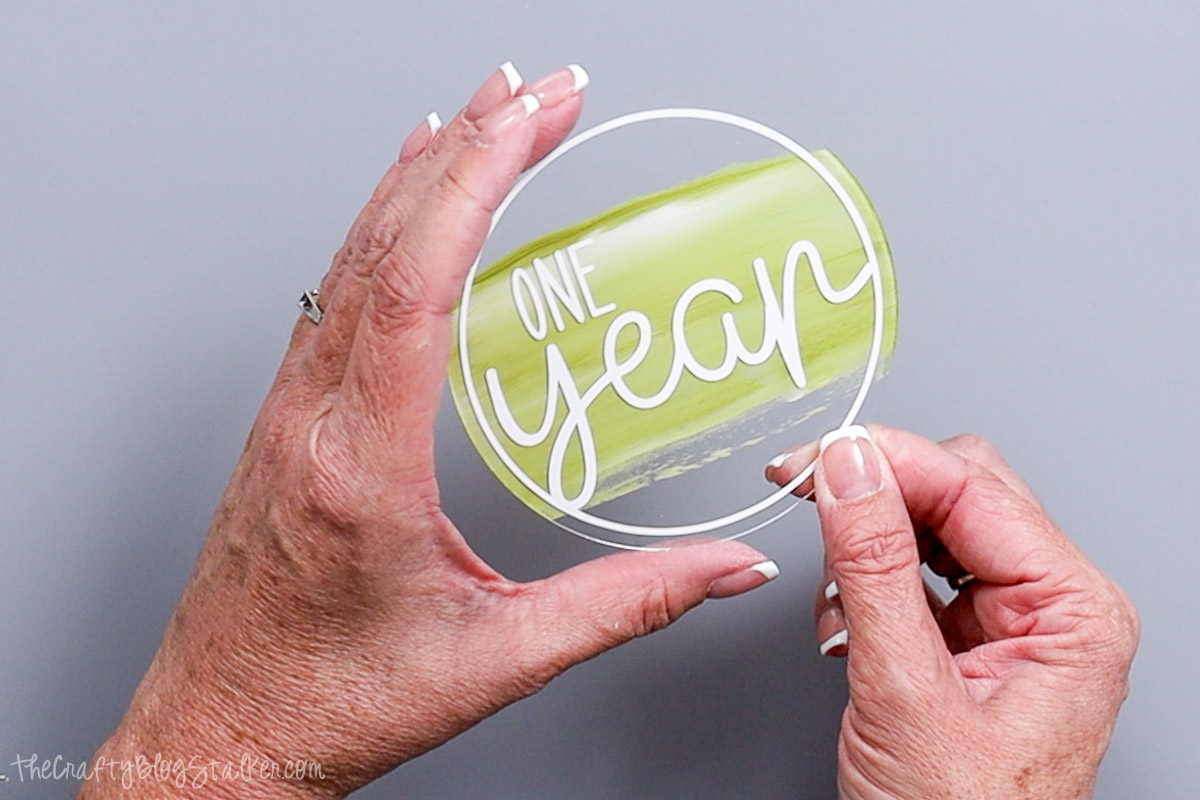
Apply the vinyl decal to all 16 discs.
Seal with Epoxy Resin
This last step is optional, but it helps the medallions to last longer without scratches.
I am using AB Resin, but UV Resin could also be used.
With AB Resin, you mix 1 part A with 1 part B and stir until completely combined.
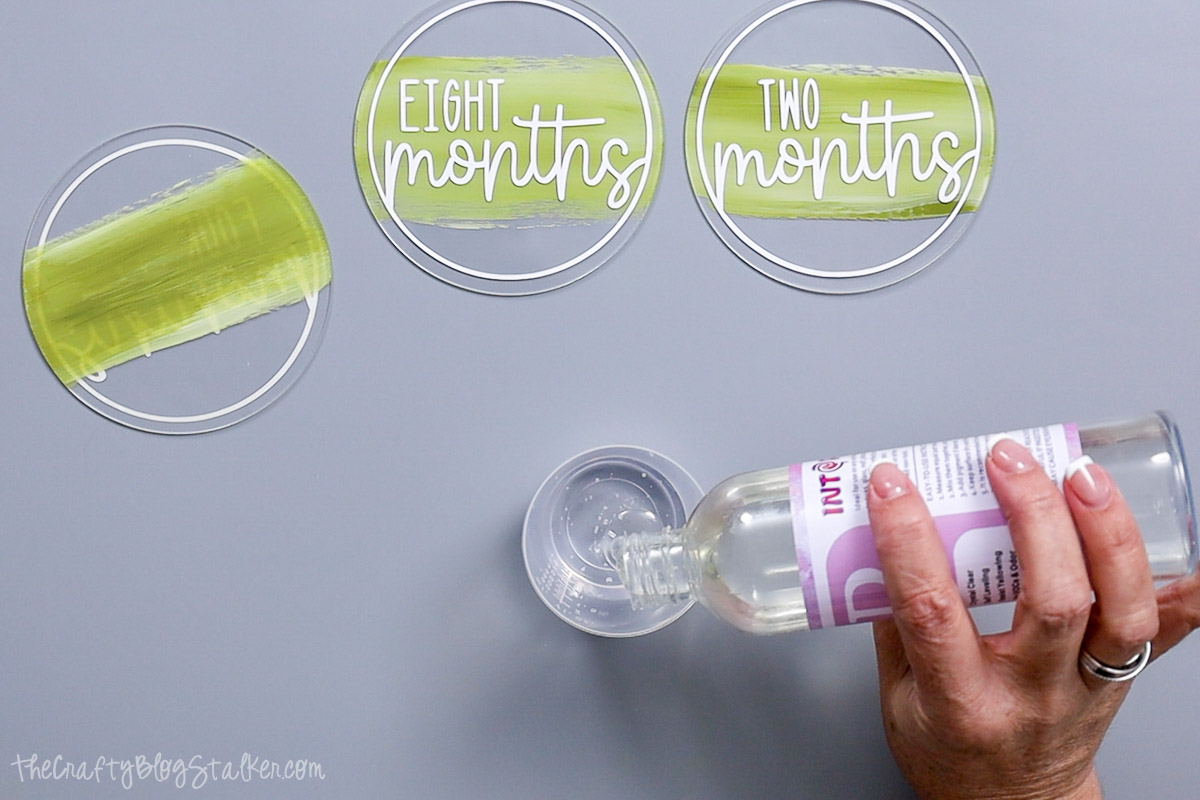
Scoop a small amount of resin onto the back side of a disc. The back is the side with the paint.
Add a little bit at a time because it is easier to add more and harder to remove excess.
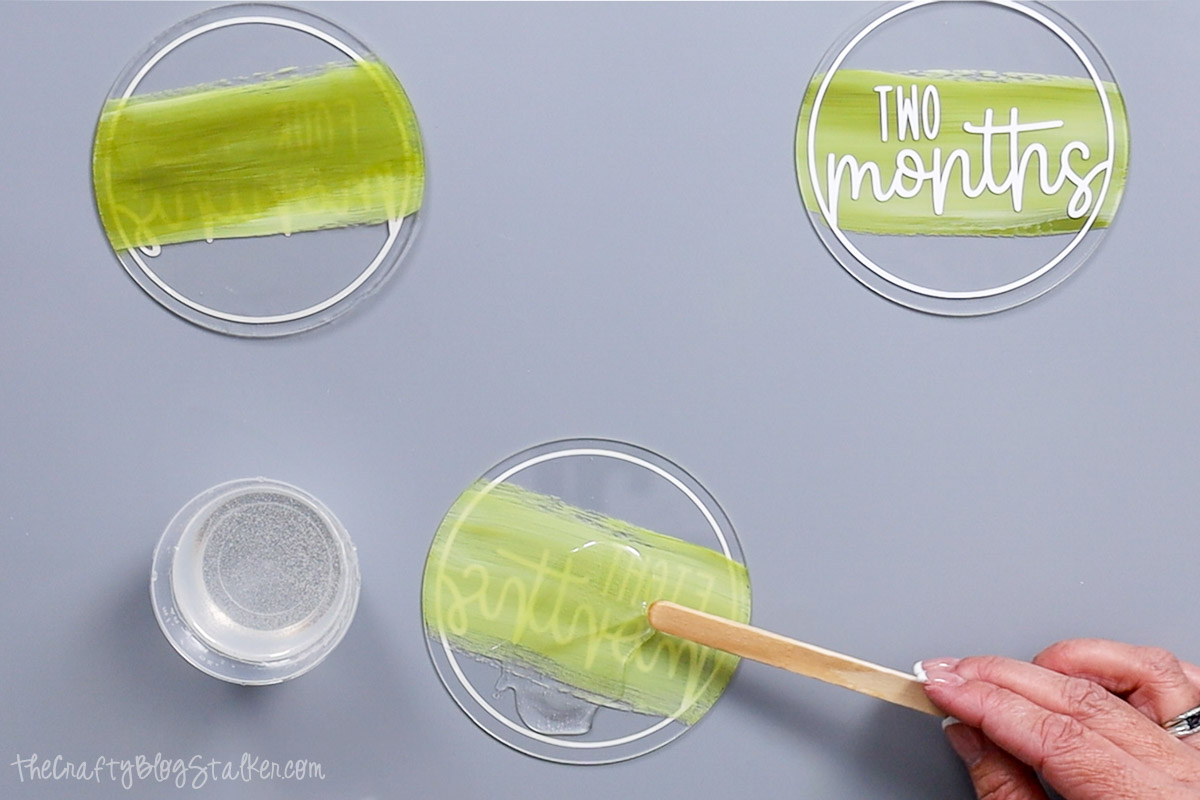
Smooth the resin over the entire back of the disc, pulling it to the edge all the way around. Add more resin as needed.
You may notice little air bubbles in the resin as you apply it to the disc.
Don’t worry. You can remove the bubbles by simply going over the resin with a lighter or small butane torch.
I had to lift mine off my counter because my table covering is plastic, and I didn’t want to melt it, but depending on your table, you may not need to do this.

Repeat with each disc and then set them aside to dry for 24 hours.

Finished Project
After 24 hours, the resin should be cured entirely, but check with your resin instructions as they may differ.
The milestone markers can now be picked up and handled without disturbing the resin.

I made these milestone markers for my daughter because she is having her first baby, and I will be a grandma!
These medallions will make taking milestone photos quick and easy, and the colors are exactly what she requested.
We are excited to meet the new little man in the family. ❤️
More Cricut Projects
Want to keep crafting with your Cricut? Here are a few more fun ideas.